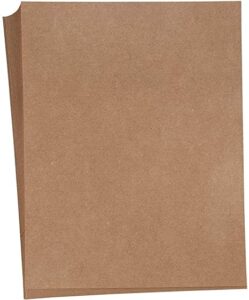
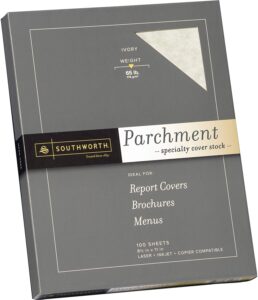
You might be shocked to learn that your antique booth price tags can play a crucial role in your overall sales strategy and the profitability of your antique mall booth. It’s true—those little one or two-inch pieces of paper can effectively help you sell merchandise!
The purpose of this article is to help you do two things:
- Utilize your price tags to their fullest potential. I see too many hard-working antique booth dealers missing sales opportunities because of deficient price tags. I will explain that what you write on the price tag and how you write it matters. I want to share with you some of the best “tips and tricks in the biz”—used by major retailers and prestigious auction houses alike—ones that you can immediately try out for yourself.
- Ensure you are getting the best antique booth price tags for the best price. I hate to see dealers wasting money on low quality price tags when they can save money while also having price tags that represent the quality of their brand.
- I also have some free price tag design downloads at the end of this post if you’re interested, so stay tuned!
Have you heard the Jessie J song, “It’s not about the price tag?” Well, if she had been talking about the antique mall booth business, she would have been wrong. It is ALL about the price tag.
So, without further ado, let’s get started.
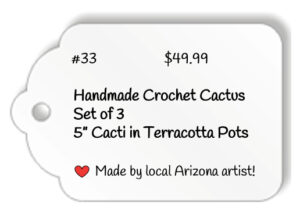
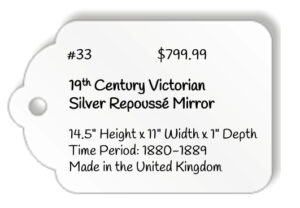
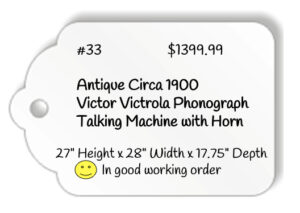
10 Proven Antique Booth Price Tag Strategies
You might have noticed there are quite a lot of words in my price tag samples above! Each word matters because it gives valuable insight about the item—and each detail will inform and appeal to potential buyers.
One key to utilizing price tags effectively is to tell customers as much as you can about the item, as concisely and neatly as possible. I recommend you use an Ultra Fine point Sharpie to help you create price tags that will help sell your merchandise!
If you’re not sure what to write on your antique booth price tags, the following list should help:
Significant Descriptors
If your item is vintage, antique, rare, original, handmade, or one-of-a-kind, be sure to write that on the tag--it may help you sell your item.
Time Period
Be as specific as possible. For example: 1880-1889. Collectors want to know as much as possible about an item prior to purchasing.
Place of Origin
Where was the item made or manufactured? For example, United Kingdom, Germany, France, Italy. Many collectors (like me) look for items from certain places of origin…places they connect with.
Style
Buyers often come to antique malls looking to finish a stylized room with a piece of furniture or décor. For example: Victorian, art deco, mid-century modern, mission, retro, etc. What you’ve written on the price tag can help confirm they’ve found the perfect piece for their space.
Materials
The type of material used can affect value or interest—so be sure to call it out on the price tag. For example, the type of metal (i.e. silver, bronze, copper), wood (i.e. maple, oak, mahogany), fabric (i.e. cotton, silk, denim), etc.
Condition
Potential buyers will want to know if the item is working or not—or has been restored—or has any damage. Many buyers are looking for missing parts to complete a project—so, don’t hesitate to sell items, “for parts only.” Some items are more valuable “as is” versus restored…so you may need to do some research—and fill out the price tag accordingly.
The Item’s Story
If there is a special story about the item—one that you will not be in your booth to tell your customers—include it on the price tag. It may help you make the sale.
Case in point, I’m currently selling the original front doors from the historic Hollywood Hotel—so, I obviously included that on the price tag! For customers considering buying those doors, that insight might positively sway their decision.
Model or Serial Numbers
These are sometimes hard to see on the item—save your customers the eye-strain and write them on the tag. Serial and model numbers can be used to research an item and prove its worth—further establishing your credibility as a dealer.
What’s Included
Let customers know what they are paying for by including those details on the price tag. For example, “Includes keys,” or “Set of 3.” Having this vital information on the price tag will provide clarity and prevent confusion.
Measurements
This is especially important for furniture, wall art, or frames. It really helps the customer to know if it will fit in their space even if they don’t have a tape measure in their pocket.
Alright, now that I’ve gone over what to include on an antique booth price tag, I feel compelled to list a few things to watch out for…
5 Things to Avoid with Antique Booth Price Tags
Sloppy or Illegible Handwriting
“It doesn’t matter what you have to say if no one can read your handwriting.” (A direct quote said to me by my 5th grade teacher.)
My handwriting has never been great—I have to work very hard to make sure my words are not too loopy, slanted or small. I’m getting better, thanks to Ms. Eliot and lots and LOTS of practice.
Being Too Vague
A smart way to reduce antique mall booth theft is to use price tags to prevent “tag-swapping.” In fact, the other day, one of the employees at my mall called to tell me that someone swapped a price tag from a $25 Hummel print onto a $400 Maxfield Parrish painting.
Fortunately, when the “tag-swapper” got to the cash register, the cashier looked at the tag, knew the difference between a Maxfield Parrish and a Hummel, and refused the sale.
You can take steps to prevent this from happening by being specific on price tags. Keep in mind, cashiers can’t be expected to identify and know the value of everything in the mall! And cashiers are very busy!
Often, there are long lines, and cashiers have to move fast. A vague price tag that says, “painting” next to something that looks like a painting could become a great bargain for a thief, and a big, expensive mistake for you.
Misleading or Misrepresenting Information
Do not say “antique” unless the item is over 100 years old. Do not say “rare” if there are multiples on eBay. Do not say “working” if the machine doesn’t work perfectly.
It is better to be honest and not sell a product right away than to be dishonest and lose a customer. (They will never come back, and they will probably tell ten of their friends.)
Hiding Flaws with Price Tags
Yes, I have seen it happen, and not just once. You know what I mean—when you pull away a price tag and right behind it there is a scuff or a chip or some kind of damage on the item. Don’t. do. that. You will lose credibility and ultimately business.
Creating Damage with Antique Booth Price Tags
Never stick or tape a price tag directly on a painting or book or piece of ephemera (among other things). The damage can be significant and irreversible.
There are plenty of creative ways to place a price tag—even if it means placing the tag next to rather than right on the product.
Additional Tips and Tricks for Antique Booth Price Tags:
Okay, before I wrap up my thoughts on antique booth price tags, I want to share some additional tips and tricks with you—for your consideration.
You may have noticed that in my price tag examples above, I have dropped the leading number on the dollar amount by one and I end the price in .99. For example, instead of $50, I put $49.99.
The reason I do this is because multiple studies have shown that our brains look at the first number and think, “$40”, which is less expensive than $50. This makes the product seem like a greater value, and even though most customers know this “trick”, it still works!
Another interesting point to note is that when it comes to pricing, studies show that size matters. The size of the price on a price tag can affect the perceived cost.
For example—larger font = larger perceived price. Smaller font = smaller perceived price. That is why I make sure that the size of the price is no larger than the size of anything else on the price tag.
My best piece of advice for you when it comes to price tags is to just put the scientific method to work for you by experimenting.
Try out some of these ideas--use what works and lose the rest. You never know—one little tweak to the way you fill out your price tag might make a big difference for your sales!
There is one more important question:
Are You Paying Too Much for Antique Booth Price Tags?
We all use price tags….we have to, right?! So, they are a necessary expense for us. But could we be paying less for them? This is something that I have researched thoroughly in my efforts to keep costs as low as possible.
Over the years, I have experimented with making my own tags as well as purchasing pre-made tags. Well, here’s a little cost-comparison in case you are curious!
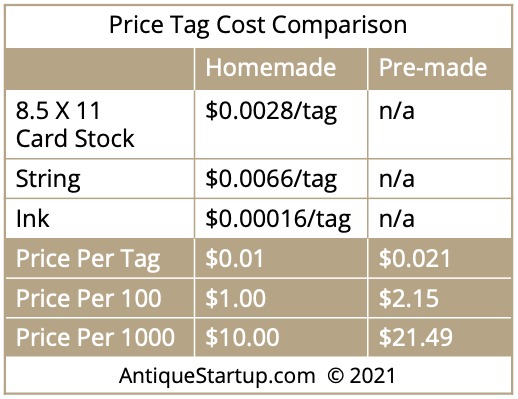
So, as you can see, there is a $11.49 savings when comparing 1,000 homemade versus pre-made tags. Let me explain how I came up with these numbers….in case you want to do a little math of your own.
Pre-made Price Tags
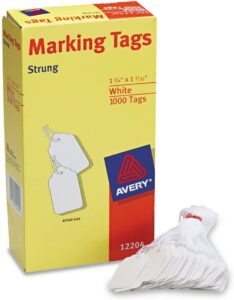
After trying many of the antique booth price tags available on Amazon, AliExpress, and elsewhere, I have found that the best blend of quality, cost and convenience is this set of Avery White Marking Tags Strung, Pack of 1,000, 1 ¾” x 1 3/32”
- This box of 1,000 price tags typically costs $21.49 (the price does fluctuate)
- $21.49 divided by 1,000 tags= $0.021 per tag
If you are someone who doesn’t have a lot of extra time or energy to make homemade tags, 2 cents per tag is a really good deal, so check these out!
Homemade Price Tags
To create my own homemade antique booth price tags, I typically use the following supplies:
Cardstock
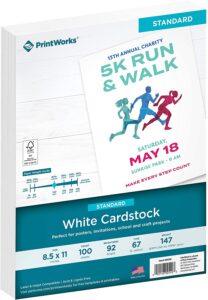
I fit 36 price tags on a sheet of cardstock, so with a pack of 100 sheets, I'm able to print out 3,600 price tags. My favorite cardstock for price tags is Printworks 8.5 x 11 White Cardstock, 67lb, which is typically 100 sheets for $9.99.
- $9.99 divided by 3,600 = $0.003 per tag
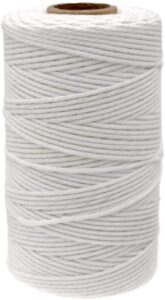
White String
I typically buy the 3 roll set (984 feet) of this particular string, which is enough for 1,968 price tags (6 inches of string per tag).
- $12.99 for 3 rolls of string divided by 1,968 price tags = $0.0066/tag
Black Ink
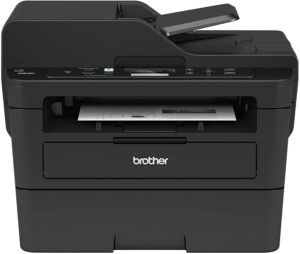
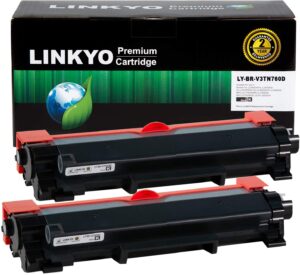
The average cost of black printer ink can vary a lot depending on your printer, but I have Brother Laser printer that I adore which was only $159 and the ink is incredibly affordable.
The toner cartridges that I use are around $15.00 each and output up to 3,000 pages (I get more like 2,500 per cartridge) so it typically costs me $0.006 per page.
- $15.00 per toner cartridge divided by 2,500 pages = $ 0.006 per page
- $ 0.006 per page divided by 36 price tags per page = $ 0.0002 per price tag
If you are using an inkjet printer, your price would go up dramatically so I would definitely recommend moving to a laser printer if you plan to print your own price tags since the affordable ink will pay for the cost of the printer in no time.
Labor
Of course, there is the added manual labor of cutting, hole-punching, stringing, etc. but I don’t mind doing this while watching my favorite shows on Netflix. In fact, I kind of enjoy it! 🙂
So, the bottom line is: I can have homemade, customizable price tags for about a penny each if I'm willing to put in the time. And, I can have a thousand homemade tags for around $10.
Seems pretty reasonable, right? Is anyone paying less than $10 for a thousand tags? (Please send me an email if you are!)
Here are some of the homemade price tag sheets that I designed:
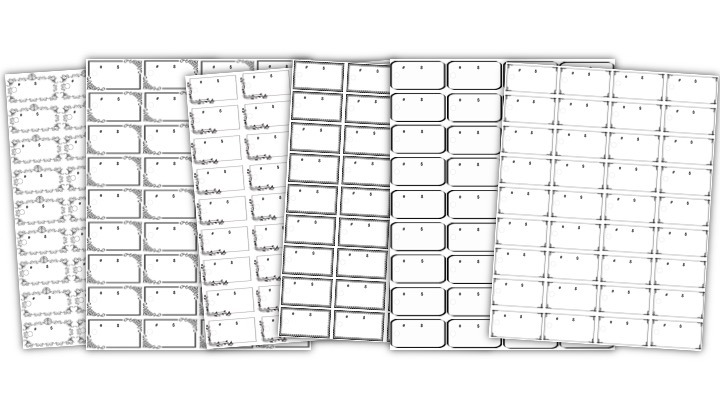
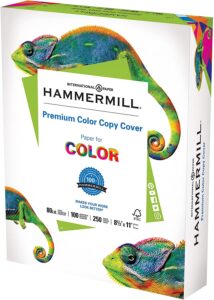
You can also print these on colored or graphic cardstock like these if you want to be extra fancy!
I’m happy to share my designs with anyone who wants them! Just let me know where to send them!

Yes, send me the free price tag designs!
I hope you enjoyed this blog post—and that you picked up some new ideas to try for yourself. Remember to use your price tags to their fullest potential—be thorough, yet concise. Say what you need to say—and say it in your best handwriting. I’m cheering for you from Antique Startup—oh the sales you will make! It’s all about the price tag!

